

Part of the Indie Authors Series
Are you about to indie publish a book but can’t figure out how to get the formatting right? Do you already use Scrivener and don’t have the budget to shell out for a high end design app like InDesign or to splurge on Vellum? Then Scrivener’s Compile settings may be the solution for you. While not for the faint of heart, you can turn out a nicely formatted book for both print and digital entirely within Scrivener. The focus here will be on print, because it’s typically trickier, but the same techniques can be used for ebooks. (Note: this tutorial uses features available in the Mac OSX version of Scrivener. YMMV with Windows.)
Set Up Folders for Your Front And Back Matter
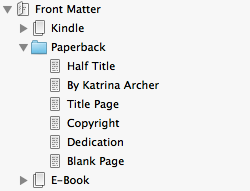
The first thing to do is get organized (boring, but you’ll thank me for it later). Each edition of your book may have different front and back matter, for example, to list different ISBNs or calls to action. In the Binder, add folders for each edition. I usually place my back matter folder beneath the main manuscript folder, whereas Scrivener’s manuscript format template provides an existing folder for front matter. In the examples below, I’ve created folders for ePub, Print, and Kindle editions. Within each folder, I’ve added files specific to the edition in question.

Collections Are Your Friend
You don’t, however, need to duplicate each document in your manuscript for each edition. Scrivener’s Collections feature lets you create groups of documents called collections, and assign the same document to different collections. It’s like having more than one Binder. You can find collections above the Binder. Simply click the + button to add a new collection. Here, I’ve created a collection for each of my Kindle, Epub and Paperback editions.

To add a document to a collection, simply select it in the Binder, CTRL- or right-click on it, and choose Add To Collection.

The Ins and Outs of the Compile Dialog
The Compile Dialog is where the meat of your formatting gets done. It can look intimidating at first glance but let’s start with the Contents tab. In the picture below, I selected the Paperback 5.5x8.5 collection as the list of files to include (1).

I also filtered the included files by this collection (2), just to make sure I’ve got the paperback files only (this is useful in case you accidentally or intentionally select the whole Binder above in 1).
If you choose to include your front matter in your specific collection, you don’t need to do anything more here. Otherwise, you can check the Add Front Matter checkbox (3) and select the correct folder for your edition.
When compiling, use the checkboxes in the file list to make sure you add page breaks before chapter headings. I also tend to compile front and back matter files “As-Is” (4), because they often contain images or other text whose formatting I don’t want Scrivener to override.
Page Setup For Print
Before formatting anything else, determine the print size of your book. Choose the Page Settings tab on the left of the Compile dialog.

Click on Page Setup, which will take you to your printer page settings.

Click on Paper Size, then, to create your own custom print size, click Manage Custom Sizes.

In here, you can set your page sizes and margins, which will typically depend on instructions from your printing service. In the example below, I’ve set up an 5.5” x 8.25” trade paperback. Name your custom size something representative, and you’re done.

Back at the original Page Settings tab, choose your margins based on the instructions from your printing service.
Headers and Footers
The Page Settings tab is also where you control the headers and footers for your book. You can have plenty of fun with fonts here to add some pizzazz to your book. Centering and left or right alignment are easily controlled by using the left, middle or right boxes in the panel.

Scrivener has a number of settings that also control when NOT to display a header/footer. Typically, you don’t want headers/footers on your front matter, or on the opening page of a chapter. Use the following checkboxes to control this:
• No header on first pages and pages following page breaks
• No header or footer on single pages
The book’s title will usually appear on one page, with the author’s name on facing pages. To use facing pages, click on the Facing Pages tab, ensure the “Use facing pages” checkbox is checked, and add your specific header/footer information for these pages in the appropriate boxes.

To have different headers/footers on your first pages, click on the First Pages tab, and select your options.

This tab is useful especially for controlling page numbering. In the version of Scrivener that I have, you unfortunately cannot choose to start your page numbering after your front matter. You can get around that by compiling your front matter separately from the main manuscript, so that your manuscript’s page count starts with the first page of Chapter 1. Then merge the two PDF documents together using software like Adobe Acrobat Pro.
Examples of headers:


In the above example there are no page numbers in the footer, and everything is left-aligned. The header was formatted by using the following Scrivener shortcodes:
<$p> ~ *<$FULLNAME>*
where <$p> inserts the page number, <$FULLNAME> puts the author name in caps, and the * * surrounding the name put it in italics.


In this example, the page numbers are in the footer (not shown) and the book’s title is centered on the page. An all caps font downloaded from Google Fonts was chosen that still emphasizes any actually capitalized letters in each word.
Using Images
You can use images in Scrivener to achieve a particular look, especially on title pages where you might be trying to match your book cover, or for chapter headings. Using images instead of text for chapter headings can often lend your book a more professional feel, especially for ebooks, since most ebook readers override your default font with one chosen by the reader. Images will increase the size of your ebook file, though, so use them sparingly, and optimize their size.
There are two ways to add images to a Scrivener document: directly or indirectly.
In the direct manner, simply go to your document, and from the main menu, choose Edit->Insert->Image From File… and pick your image. This puts the image straight into the document so you can actually see it, but sometimes makes it harder to control its size.
In the indirect manner, first create a folder called Images in your binder. Drag and drop any images you want to use in your manuscript into this folder. Then in the Scrivener page in which you want to include your image, type:
<$Img:name;w=250>
Replace “name” in the above with the name of your image. The “w=250” lets you control the size of your image. Play with the number until you’re happy with the size.
Here’s a sample title page that used images to achieve the final effect:

Text Formatting
For a final print book, first, remove all transformations by unchecking all the boxes in the Transformations tab. These might be checked if you previously compiled your manuscript for standard manuscript format, which substitutes underlines for italics, etc.

Also uncheck everything in the layout tab.

Choose a separator for your scene breaks.

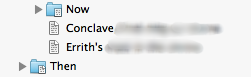
You can see in the above screenshot that Scrivener has many different types of separation between documents, defined by their relative position within the Binder. I typically put my chapter headings in folders, with the chapter text in a subdocument, and each scene in a separate document. In the Binder that arrangement would look like below.
Given this layout, I only use an empty line to separate folder-to-text documents once compiled. My text-to-text document separator might be *** or ~*~ to indicate the scene break. Note that you can even use an image in here using the <$img> technique described above, but this will inflate your file size.
The Formatting tab is where you finally format your text. This eliminates the need to format each document in Scrivener separately, or to reformat each individually if you are compiling your manuscript for a different reason (agent submission vs. final print proof, for example).

Ensure the “Override text and notes formatting” checkbox (1) is checked. This will replace any formatting in each compiled document with what you define here, based on the organization of documents in the Binder. For instance, a Level 1 folder might represent a chapter heading. In the example below, I clicked on the Level 1 folder in the Formatting tab (2), and Scrivener highlighted in yellow for me all documents in the Binder (3) that will receive this formatting. Then, I clicked in the box with the sample text (4) and began formatting. I made sure to remove any indentations from first lines (5), centered the text on the page (6), and chose a dramatic font and set its size quite large (7). I also added page padding lines to move the chapter headings down the page (8).
Next, define the formatting for your text. In the example below, these are Level 2 documents (again highlighted in yellow). Here I chose a more standard font (Garamond is pretty typical for print), and set my paragraph indents, page padding and line spacing (9) appropriately.

The final result:

Note that while ebook readers often override the default fonts you choose here, I typically choose one anyway for safety’s sake.
If you want different scenes in your book to have different formatting, simply move them into a different level in the Binder tree. Then add new levels in the Formatting pane as needed by using the little += button (10) next to the Options… button.
Saving Your Compile Settings
Once you’ve got everything set up the way you want it, make sure you save your settings, so you can re-use them for your next book. Click the Format As: bar, and select Manage Compile Format Presets.

Then, either click the + button to create a new preset, or Update to edit an existing one. I keep my presets in the Global tab, rather than Project tab, as Project presets are not viewable in other Scrivener projects, which limits their re-use for different books.

Compile and Test
Aside from a few minor details, you’re now ready for the last step. Hit the Compile button and let Scrivener do its thing. Be sure to proof your resulting PDF, ePub or MOBI files. I have an iPad so will load both the ePub and MOBI files into the appropriate app in order to inspect them prior to publication. You may have to compile and test/proof multiple times before you’re happy with the final result, but if you’re willing to play around and have good attention to detail, you’ll likely be pleased with the result.
Have fun!
 Katrina Archer is the author of dark fantasy The Tree of Souls, YA fantasy Untalented, and nature photography book Shorescapes of Southern British Columbia. A professional engineer, she lives on her sailboat in Vancouver, BC, Canada. Katrina has worked in aerospace, video games, and film, and has been known to copy edit for fun.
 Katrina’s work has been a finalist for the Toronto International Book Fair’s Creation of Stories award. She is an alumnus of the Viable Paradise and Paradise Lost writing workshops, and a member of Codex Writers.
She owns 500 books, four vehicles (none of which is a helicopter), one dog, too many Apple devices, and is tolerated by her cat, who is more famous in Germany than she is.
Website | Facebook | Twitter | Goodreads | Amazon | Barnes & Noble | iTunes | Indie Bound

When the river spits Umbra onto its bank, naked and shivering, the only clue to her identity is the arcane brand seared into her skin. A brand hunted by both a murderous necromancer and a handsome stranger. A brand that thrusts Umbra into a simmering conflict between the ascendant Clans and the nomadic Gherza. A brand that may make her the key to averting all-out war.
The Tree of Souls weaves an intimate tale of dark sorcery, doomed love, and implacable revenge, amid an age-old clash of nations, with all the souls of the living hanging in the balance.
Great tips! I didn't know the collections part. Thanks!
ReplyDeleteWOW! What a great post. Thank you so much for putting this together. I'm a Scrivener newbie, and this helps a lot.
ReplyDeleteSuperb.
ReplyDeleteBeen using Scrivener for several years, and many of these I'd fallen over (or into, LOL), but I've been forking the files when I made a CreateSpace version, and then trying to keep things the same over the two files. I'll try Collections for this; it may make life easier.
ReplyDeleteThanks!
I love Scrivener. I can see I need to play with collections, hadn't thought of using them that way!
ReplyDeleteThis is great. Thanks for putting it together. I've been writing in Scrivener for a few years and recently compiled my ebooks in it. I've done the paperbacks in In Design (which I know from many years working in newspaper graphics). But I'm going to try dining my next paperback in Scrivener. Like tonyl said above, I don't like having two versions if I have to go back and fix a typo, or two.
ReplyDeleteIs this the mac version? I can't figure out how to put images in a windows version...
ReplyDeleteThis was the Mac version. YMMV on Windows.
DeleteFound this article on google. The <$Img command doesn't seem to do anything on windows. Has anybody else had success?
ReplyDelete